
Apply DTF stickers on t-shirts is one of the easiest ways to create professional-quality custom apparel. Whether you are a clothing brand, print shop or a beginner trying DTF printing for the first time, following the correct application process is essential for achieving long-lasting and vibrant results.
DTF stickers are designed to work with a heat press, allowing the printed design to bond permanently with the fabric. When the correct temperature, pressure and pressing time are used, the transfer produces excellent colour, sharp details and outstanding wash durability.
In this guide, you’ll learn the complete step-by-step process of applying DTF stickers on t-shirts, along with the recommended heat press settings, common mistakes to avoid and tips for achieving the best results every time.
Tools You’ll Need to Apply DTF Stickers
Before applying DTF stickers, make sure you have the right tools ready. Using the correct equipment helps achieve better adhesion and improves the durability of the print.
You will need:
- A heat press machine
- Ready-to-press DTF sticker
- Cotton, polyester or blended t-shirt
- Heat-resistant tape (optional)
- Parchment paper or Teflon sheet (if required)
- A flat and clean working surface
Preparing everything in advance makes the application process quicker and helps avoid common mistakes during pressing.
Step 1: Prepare the T-Shirt
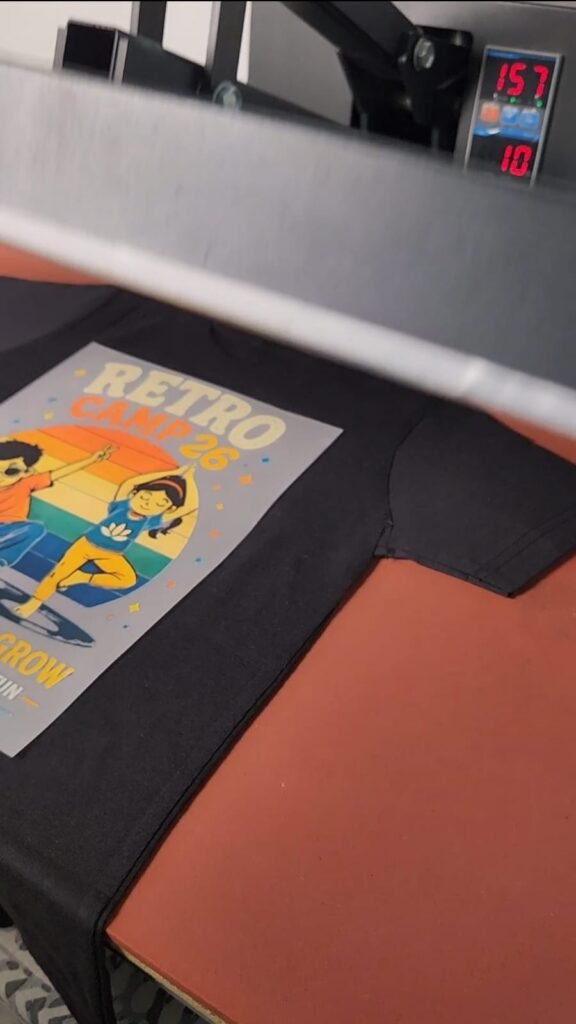
Start by placing the t-shirt flat on the heat press. Before applying the DTF sticker, pre-press the garment for 5–10 seconds to remove moisture and wrinkles. This simple step helps the transfer bond more effectively with the fabric.
Additionally, check that the surface is free from dust, lint or loose fibres. A clean and smooth garment provides better adhesion and produces a more professional-looking finish. Taking a few extra seconds to prepare the fabric can significantly improve the final print quality and wash durability.
Step 2: Position to Apply DTF Stickers
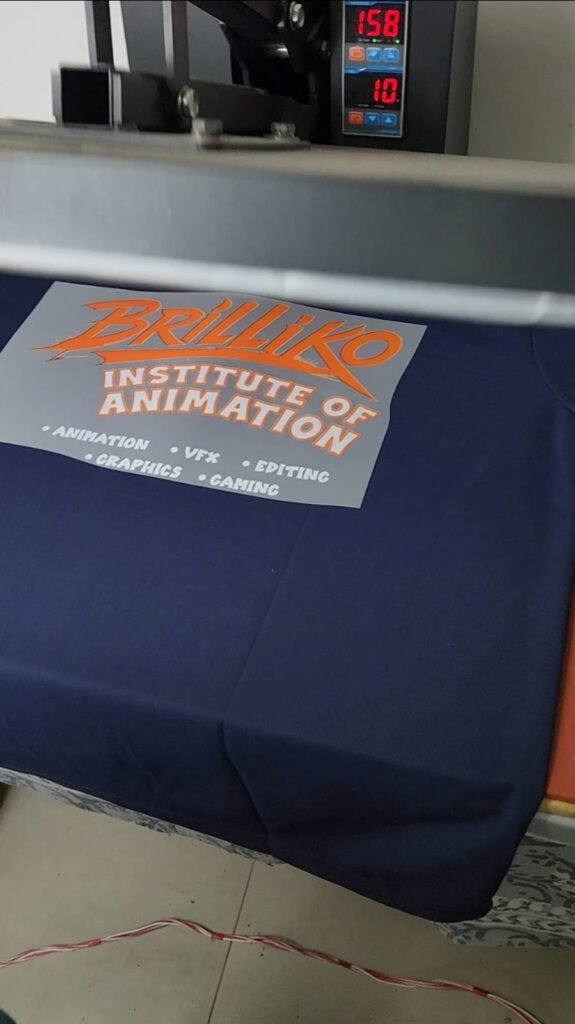
Place the DTF sticker on the t-shirt with the printed side facing the fabric. Align the design carefully according to the desired placement, ensuring it is straight and centred. If needed, use heat-resistant tape to keep the transfer from moving during pressing. Taking a few moments to position the design accurately helps achieve a clean and professional final result.
Step 3: Heat Press the Design
Set your heat press according to the recommendations provided with your DTF sticker. Most DTF transfers are applied at 150–160°C (300–320°F) for 10–15 seconds using medium pressure. Close the heat press evenly without shifting the garment or transfer. Maintaining the correct temperature, pressure and pressing time is essential for strong adhesion and vibrant colours.
💡 Pro Tip: Always test a new DTF sticker on a spare piece of fabric before applying it to a customer’s garment. This helps confirm the correct heat press settings and prevents costly mistakes.
Step 4: Peel the Film
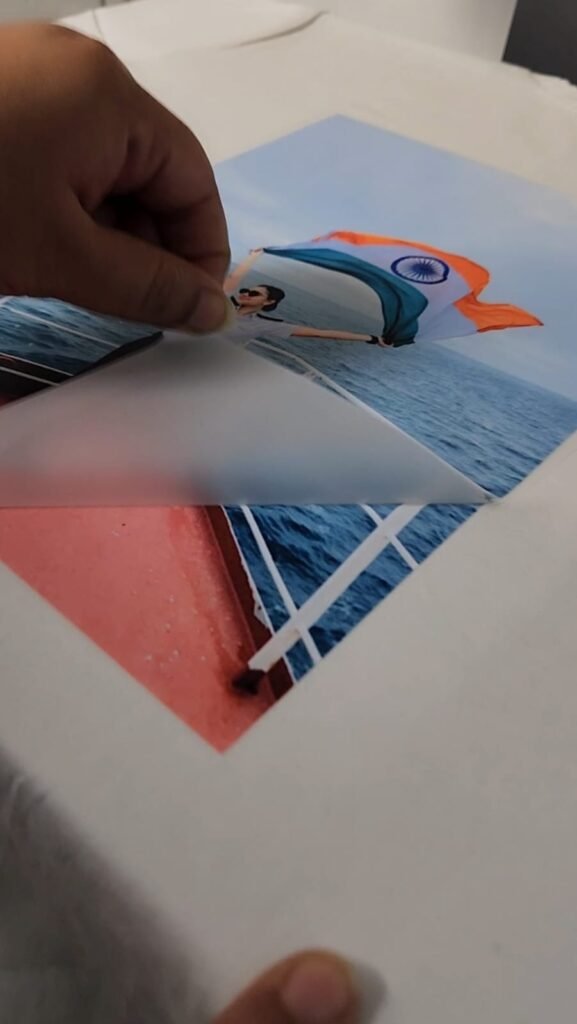
After pressing, follow the manufacturer’s instructions to determine whether your DTF sticker is a hot peel or cold peel transfer. Peel the film slowly and evenly from one corner. If any part of the design lifts with the film, place it back down and press again for a few seconds before attempting another peel.
Step 5: Final Press for Better Durability
Once the film has been removed, perform a final press for 5–10 seconds using parchment paper or a Teflon sheet if recommended. This finishing press helps improve the bond between the design and the fabric, enhances the print’s appearance and increases its resistance to repeated washing and daily wear. learn more.
Common Mistakes to Avoid while you Apply DTF Stickers
Even high-quality DTF stickers can produce poor results if they are not applied correctly. Avoid these common mistakes to achieve the best finish:
- Using the wrong heat press temperature or pressing time.
- Applying too much or too little pressure.
- Skipping the pre-press, which leaves moisture in the fabric.
- Peeling the film before the recommended hot or cold peel time.
- Pressing on garments with dust, lint or wrinkles.
- Washing the t-shirt immediately after application instead of waiting at least 24 hours.
Care Instructions After you apply DTF Stickers
Proper garment care helps maintain the colour, flexibility and durability of DTF stickers for a long time.
- Wait 24 hours before the first wash.
- Wash the t-shirt inside out using cold or lukewarm water.
- Use a mild detergent and avoid bleach.
- Do not dry clean unless recommended.
- If ironing is required, iron the garment inside out and avoid direct contact with the printed design.
Frequently Asked Questions
1. Can I apply DTF stickers with a household iron?
A household iron can work for small projects, but a heat press is highly recommended. A heat press provides even temperature and pressure, resulting in better adhesion and longer-lasting prints.
2. How long do DTF stickers last on t-shirts?
When applied correctly and cared for properly, DTF stickers can withstand dozens of washes while maintaining their colour, flexibility and print quality.
3. Which fabrics are suitable for DTF stickers?
DTF stickers work well on cotton, polyester, poly-cotton blends and many other fabric types, making them suitable for a wide range of apparel.
4. Should I wash the t-shirt immediately after application?
No. Wait at least 24 hours before the first wash to allow the adhesive to cure properly and achieve maximum durability.